
Skipping Stones · Level 2 · Board 4
Catches become stepping stones
Use controlled catches to create access to the lower dock and the checkpoint beyond the left pool.
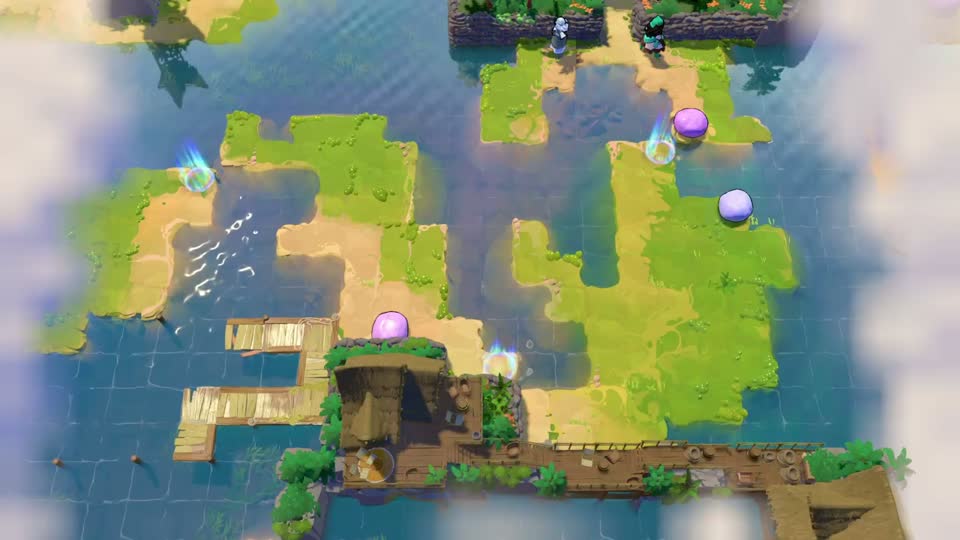
Is this your board?
A green island on the right, a winding pool on the left and two short wooden jetties at the lower-left corner. Pink and blue stones mark the route.
If your layout differs, compare the other boards before following this route.
A = the original sailor from Level 1. B = the companion introduced in Level 2. Left, right, up and down refer to the pictured board.
Choose how much help you want
Stop after any hint. The complete route and later-state picture remain hidden below.
Hint 1What to notice
A caught throw can change the water crossing itself. Look at what remains below the receiving sailor.
Hint 2What to set up
The first exchange opens the upper checkpoint. The blue stone then gives you access around the lower side.
Hint 3The decisive move
For the last crossing, keep the receiving sailor directly opposite the throw. Moving away early loses the submerged stepping point.
Open the full routeSolution spoilers and the target state
Open the first checkpoint
A pushes the right pink stone left. B sends the left pink stone right to A. Let A receive it: the submerged result opens the checkpoint crossing.
Relay the blue stone
Move A two tiles right. B pushes the blue stone up across the water. A sends it left and then down to B. Move B left two, down six and left three.
Make the lower crossing
Move A left, down six, left three, up, left and up into the blue-stone column. B sends the stone up to A and stays in place. A sends it back down to B, creating the next stepping point.
Arrange the left-pool exchange
Put B at the lower-left wooden dock. A moves the remaining pink stone left twice, then walks up three and left two. B pushes the stone up, then walks right, up six, left four and up. A brings the stone to one tile below B and returns to the lower-left dock.
Finish the crossing
B pushes down to A and stays put. A pushes back up to B. Use the resulting crossing to reach the next checkpoint.
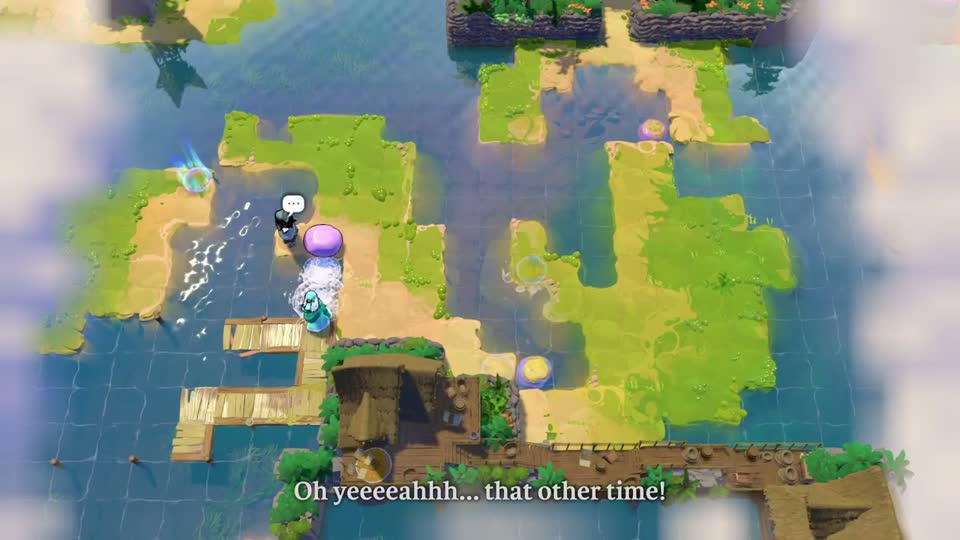
Check your result
Each exchange should add access where the receiving sailor stands. The final receiver stays aligned until the return arrives.
If your attempt went wrong
If a catch fails, undo to the moment before the throw and check both sailors’ rows or columns. Do not change an earlier successful submerged crossing.
Watch the original move-by-move demonstration ↗
Opens YouTube in a new tab. No video or third-party player loads on this page.
Use directions relative to the board image. Where timing matters, use your game's current slow-time binding. Launch-layout route; the October 9 update changes some South-world checkpoints.
Further reading: Game Rant's Level 2 walkthrough. Hint wording and route explanations by Sinking Star Hub. See how to report a mismatch.