
Mirror Isles · Visual room directory
Find your mirror room
Match the island layout first. Room numbers below follow Gamer Guru’s recording, not official room IDs or the South-world Board sequence.
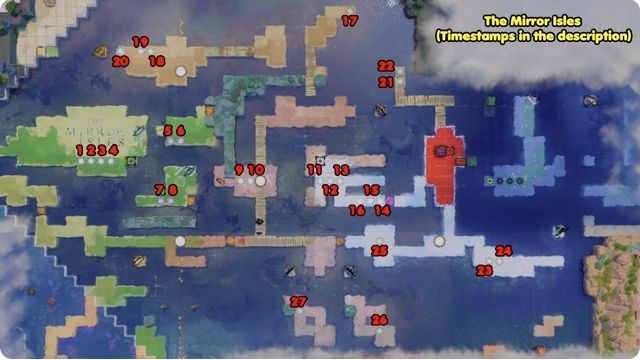
Which island matches your screen?
In the pictured sequence, rooms 1–4 belong to the first green island at the west of the map. Rooms 5–6 are on the green island immediately east; rooms 7–8 are on the small green island to the south. Use the room pictures below to choose the matching puzzle.
These relationships identify the recorded area. This page does not establish a route from the Crossroads to the Mirror Isles.
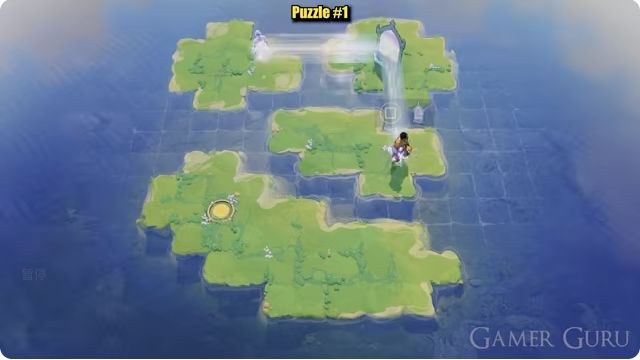 Mirror Isles · Room 1
The first mirror: reach the southwest island
Four islands, a northeast mirror and a gold circle to the southwest. Match this layout, then choose a hint if you need help reaching the exit.
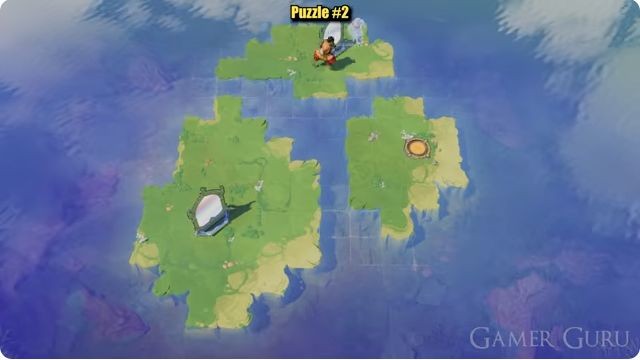 Mirror Isles · Room 2
Two mirrors and an eastern exit
Two mirrors sit on different islands, with the gold circle to the east. Match the picture before choosing how much of the route to reveal.
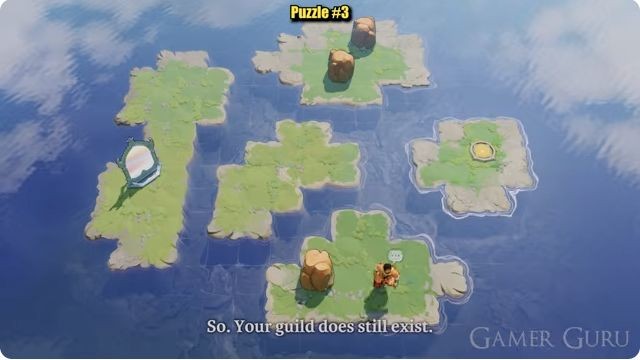 Mirror Isles · Room 3
Two northern rocks and an eastern gold circle
Match the five-island layout, two northern rocks and western mirror. The gold circle is on the small eastern island; choose a hint when you want the route.
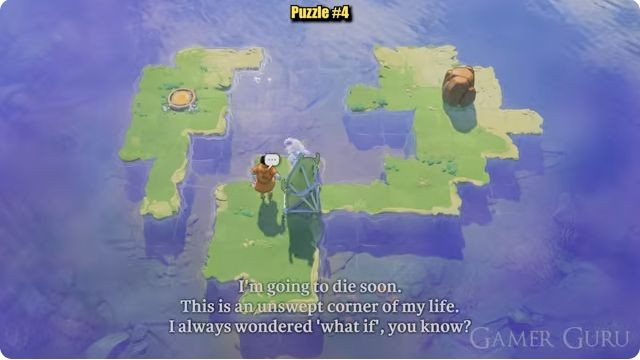 Mirror Isles · Room 4
The northwest gold circle and one rock
Find the isolated northwest gold circle in the three-island layout, with a rock on the eastern island and a mirror near the starting area.
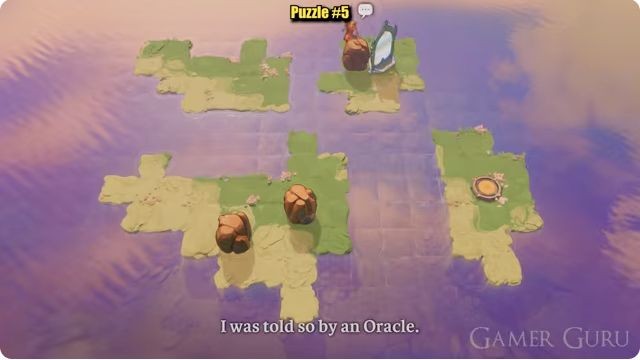 Mirror Isles · Room 5
Four islands, three rocks and an eastern exit
Match the northeast mirror, the three rocks and the isolated gold circle to the east. Open a hint when you want help with this four-island room.
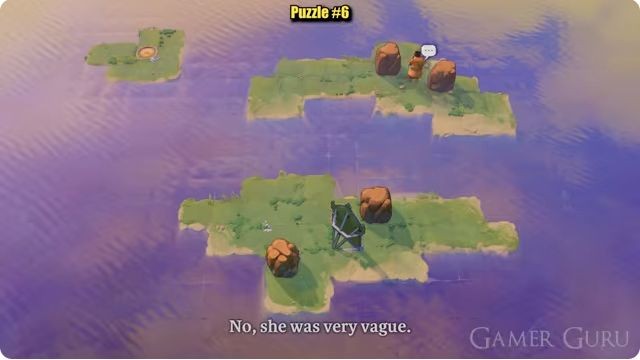 Mirror Isles · Room 6
The tiny northwest exit island
The gold circle is on a tiny northwest island, away from the two broad islands holding four rocks and a mirror. Compare the layout before opening the route.
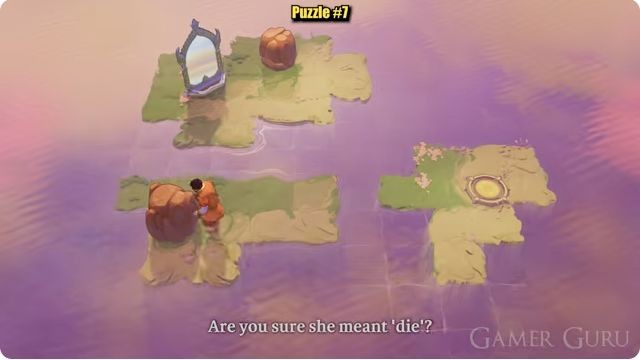 Mirror Isles · Room 7
Two rocks between three islands
Compare the two rocks, the mirror on the northern island and the isolated eastern gold circle. The route stays hidden until you choose a hint.
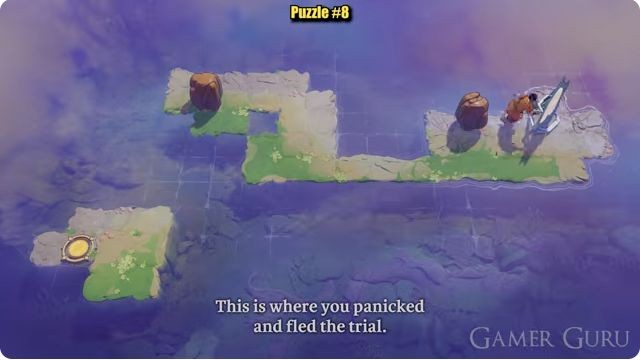 Mirror Isles · Room 8
The bent island and southwest exit
Match the long bent island, two separated rocks and the small southwest gold-circle island. Choose a hint to keep the rest of the solution hidden.
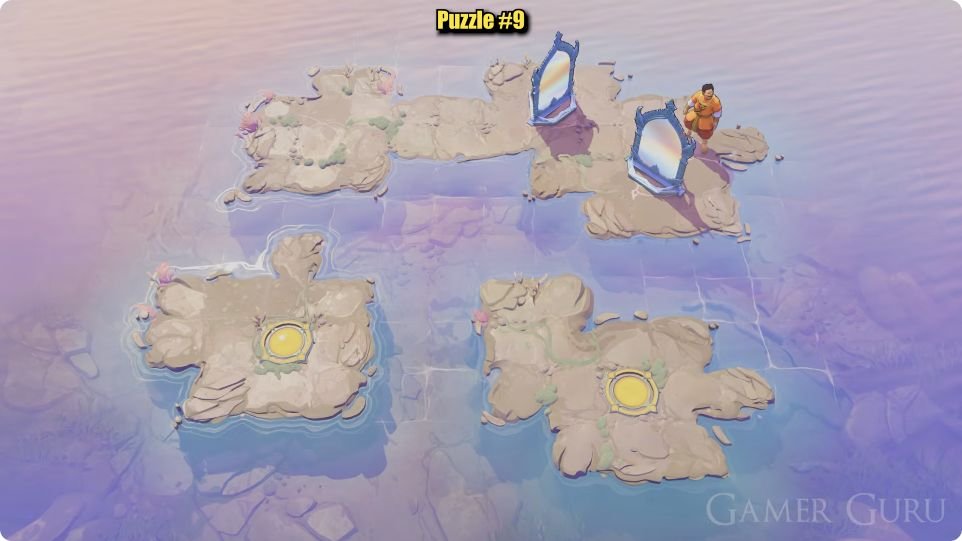 Mirror Isles · Room 9
Two upper mirrors and two lower circles
Match the upper bridge and its two mirrors with the two gold-circle islands below. Choose a hint before opening the complete route.
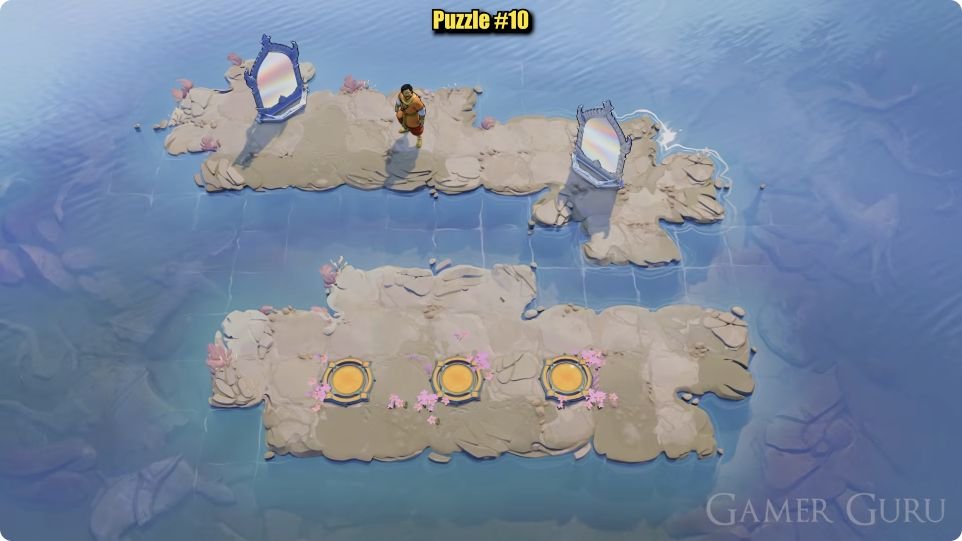 Mirror Isles · Room 10
Two mirrors above a row of three circles
Match the two upper mirrors and the lower row of three circles. The lower island’s north protrusion, side shores and uneven southern edge are useful landmarks.
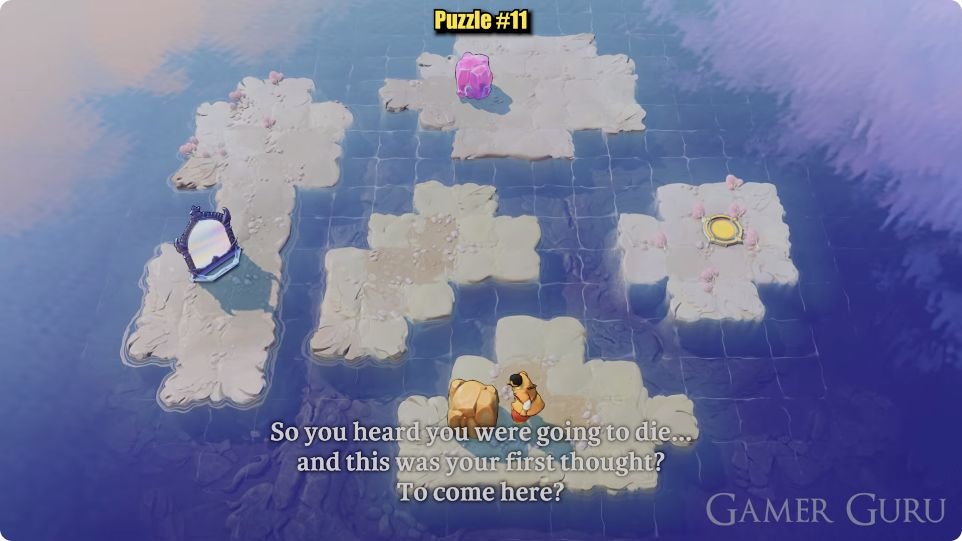 Mirror Isles · Room 11
A pink rock, a western mirror and five islands
Match the pink northern rock, the tan starting rock and the western mirror. The gold circle is on its own eastern island in this five-island room.
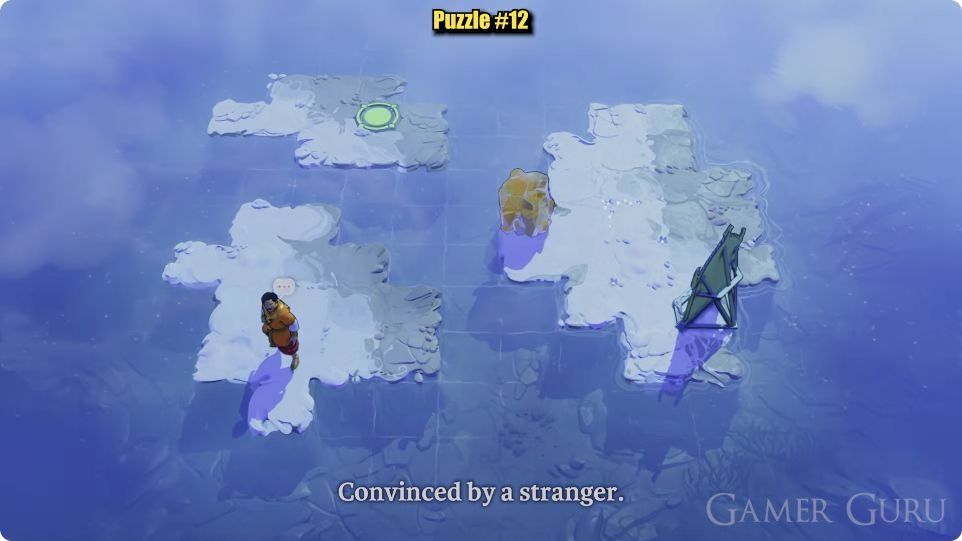 Mirror Isles · Room 12
Snow, a gold rock and the northwest green circle
Compare the snowy three-island layout, the green-backed mirror and the gold rock. The target is the green circle on the small northwest island.
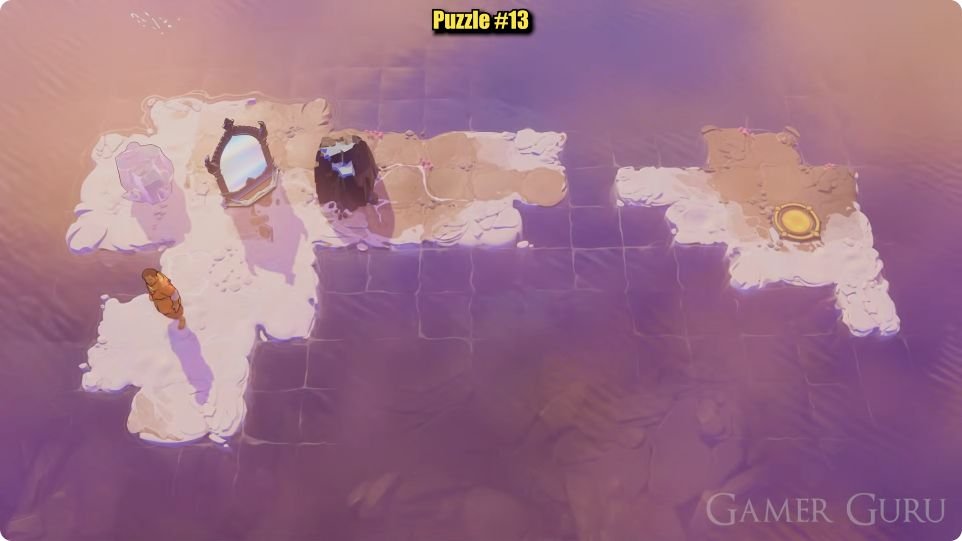 Mirror Isles · Room 13
Pink rock and dark block on the long arm
Match the pink rock, dark block and long eastern arm before selecting a hint. The circle is across the water on the separate eastern island.
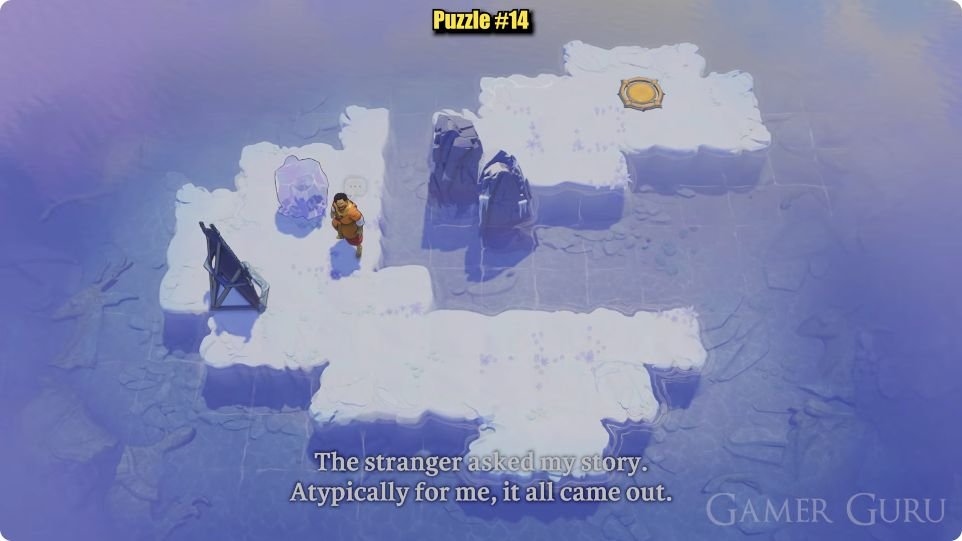 Mirror Isles · Room 14
Snowy hook-shaped land and two dark pillars
Compare the snowy hook-shaped land, pink rock, two dark pillars and northeast circle. The pillars stay in place in this recorded route.
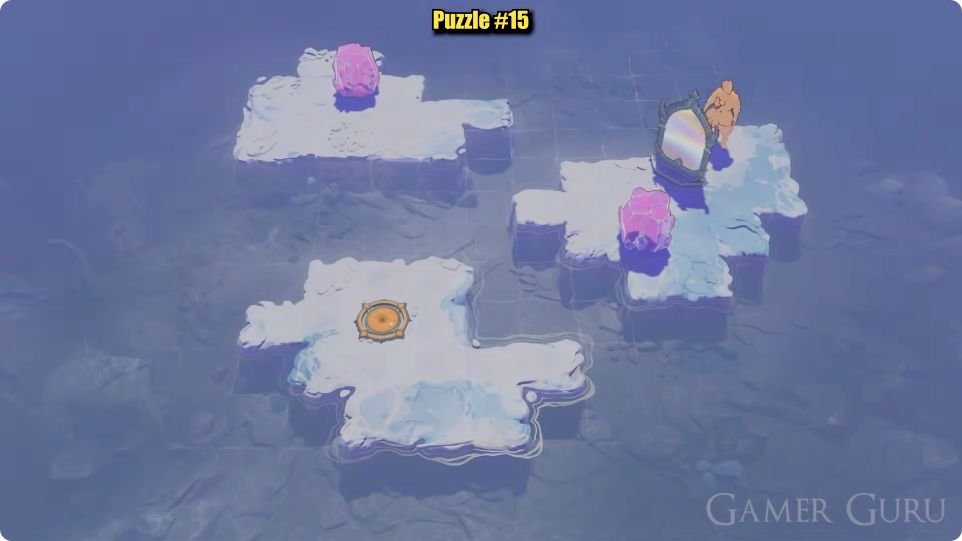 Mirror Isles · Room 15
Three snowy islands and two pink rocks
Match the three snowy islands, two separate pink rocks and southwest circle. Keep track of which rock begins beside the starting mirror.
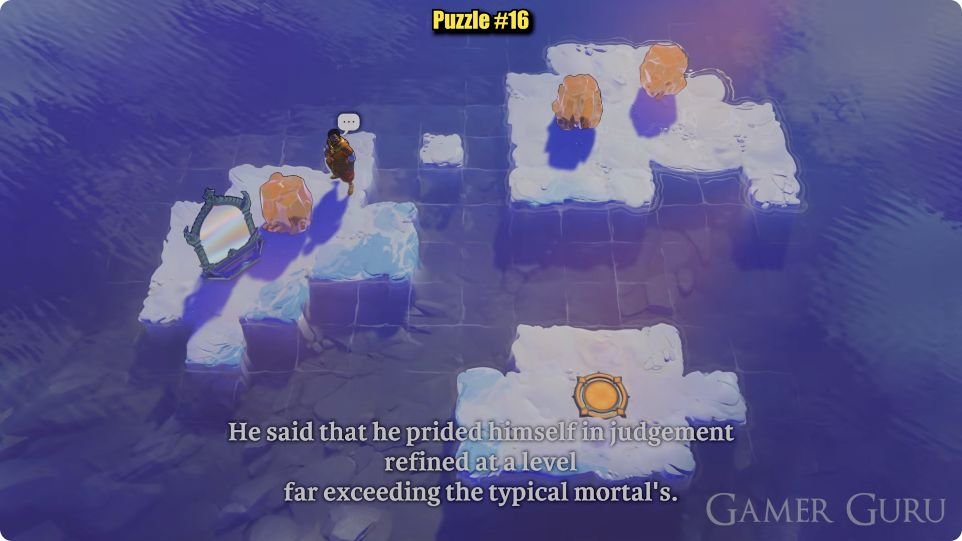 Mirror Isles · Room 16
Three amber rocks around a white gap tile
Match the three amber rocks and the isolated white tile between the western and northeast islands. The circle is on the separate southern island; pale character outlines are reflections.
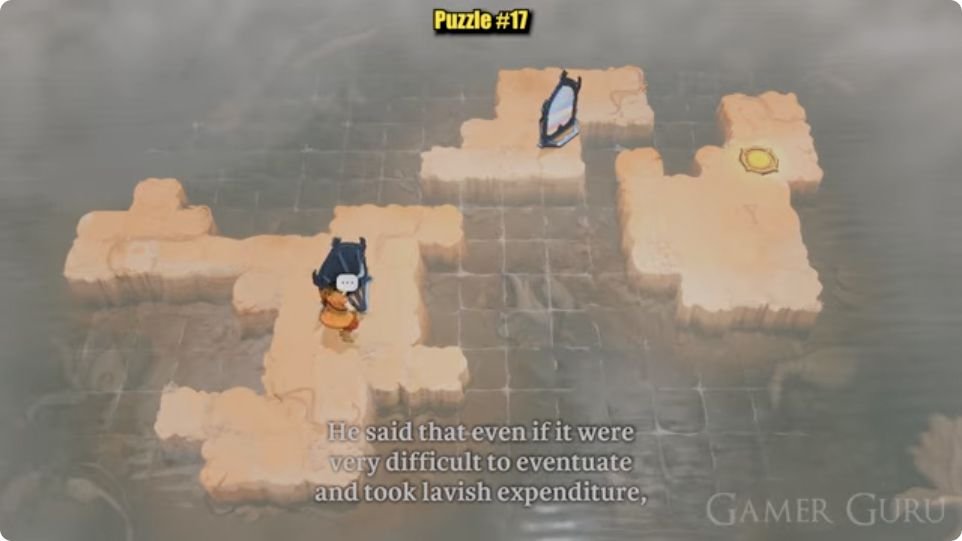 Mirror Isles · Room 17
Two mirrors, a northern island and an eastern exit
Match the long western arm, the mirror on the northern island and the eastern gold circle. Choose a hint when you want to connect these three islands.
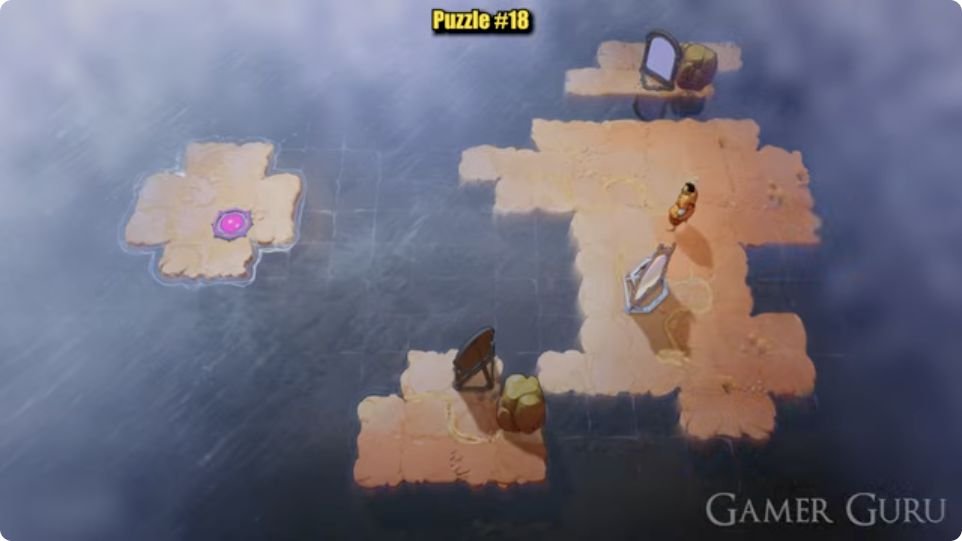 Mirror Isles · Room 18
Three mirrors and the western purple circle
Compare the three mirrors, the two separated rocks and the purple circle on the western island. Open a hint only when you want help linking this four-island layout.
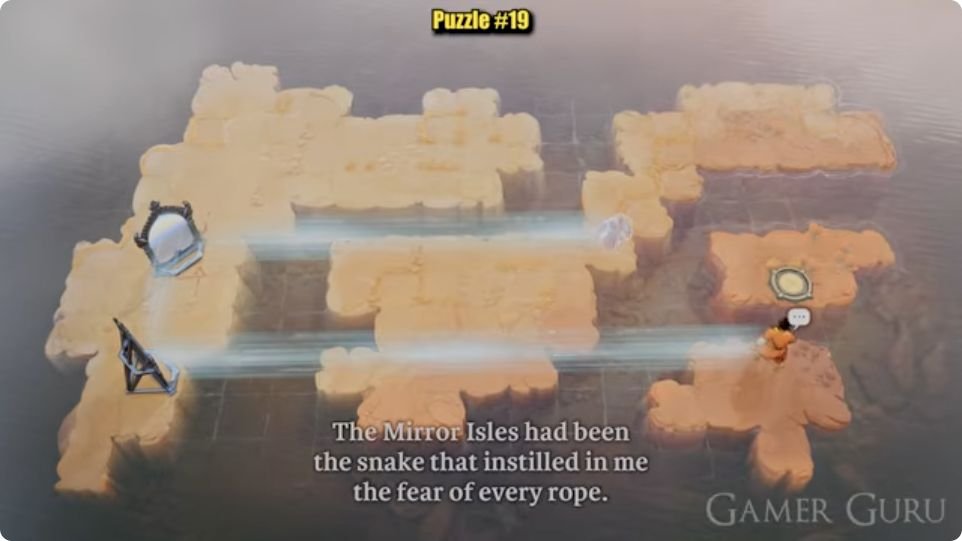 Mirror Isles · Room 19
Two western mirrors and a northeast bend
Match the two western mirrors, the long upper-right arm and the separate eastern gold circle. The starting character is on the small southeast island.
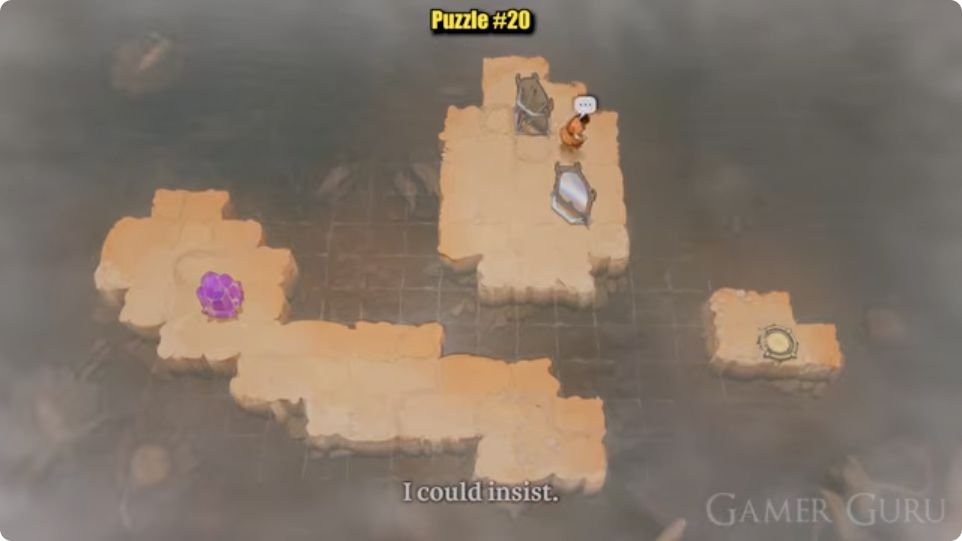 Mirror Isles · Room 20
Two mirrors, a purple crystal and an eastern exit
Match the two northern mirrors, the purple crystal on the southwest bend and the eastern gold circle. The crystal is an object, distinct from the character and the pale reflection.
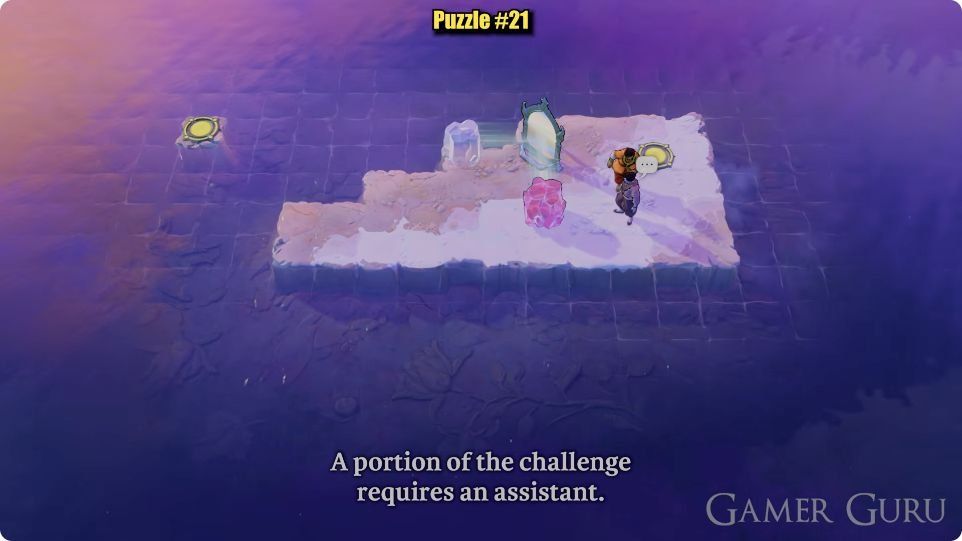 Mirror Isles · Room 21
One island, a purple crystal and two circles
Match the two distinct characters, the purple crystal and the two separated circles. One target lies west of the island rather than on another visible island.
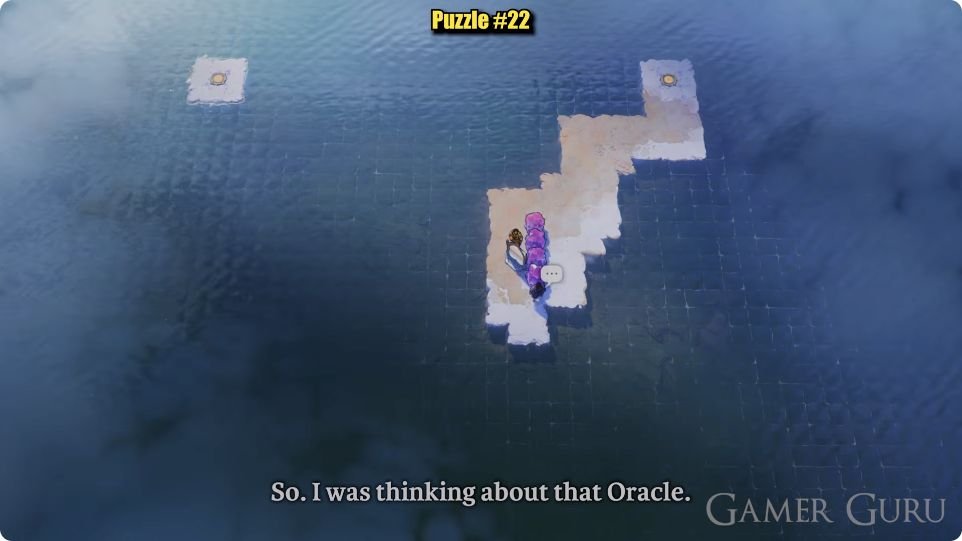 Mirror Isles · Room 22
Four purple crystals and two distant circles
Match the four purple crystals, the two starting figures and the stair-shaped main island. The two circles are far apart, one at northeast and one on the isolated northwest island.
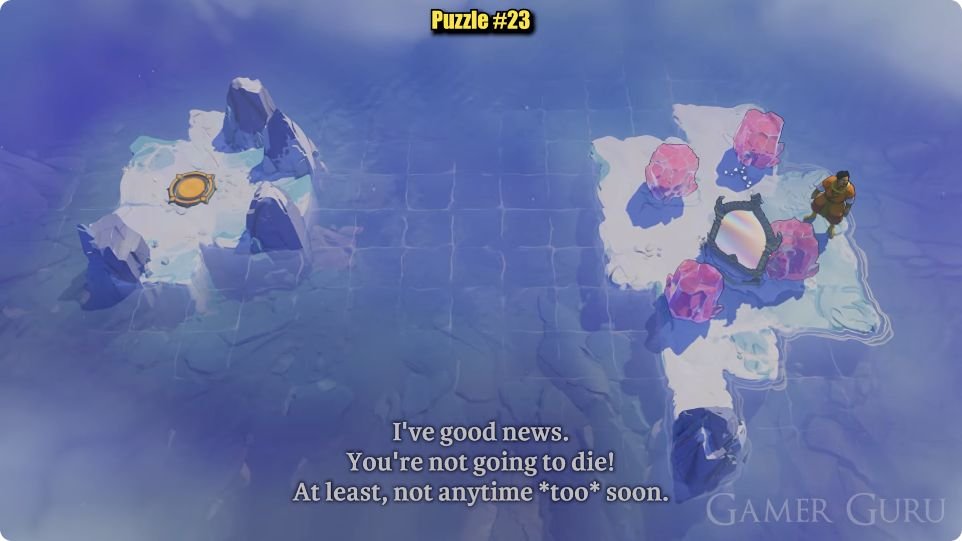 Mirror Isles · Room 23
Four red crystals and the western circle island
Compare the four red-pink crystals, the eastern mirror and the rocky circle island to the west. The dark pointed rocks are not moved in this route.
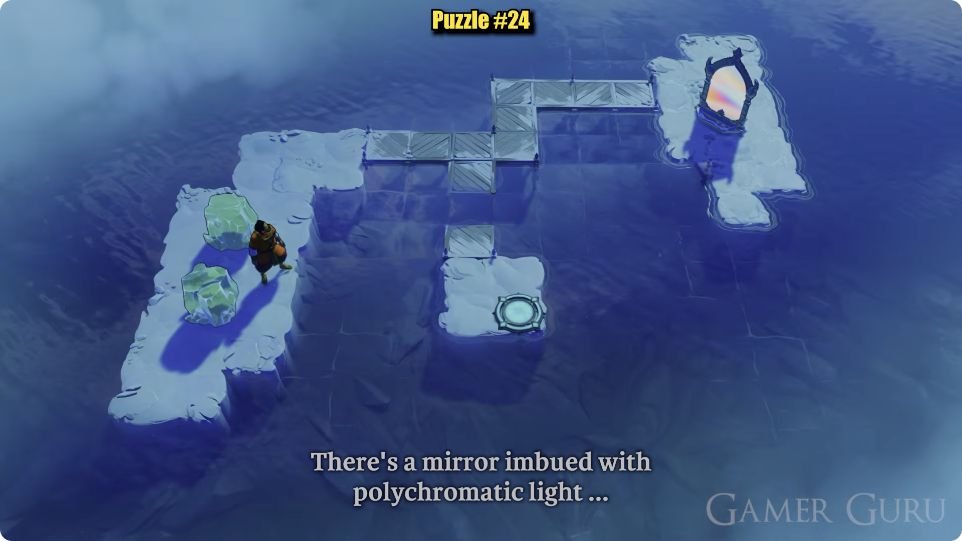 Mirror Isles · Room 24
Two green crystals and a bent metal walkway
Match the two green crystals, the connected metal walkway and the single gap above the small exit island. Choose a hint when you want help with that final crossing.
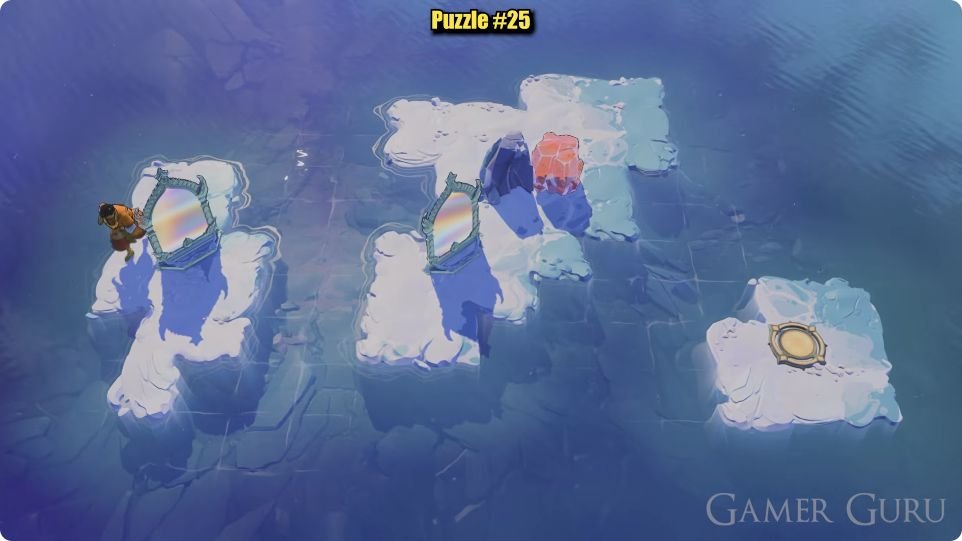 Mirror Isles · Room 25
Two mirrors, red crystals and an eastern crossing
Compare the mirrors on the western and central islands, the dark pointed rock and the southeast gold circle. The red crystal starts beside the central rock.
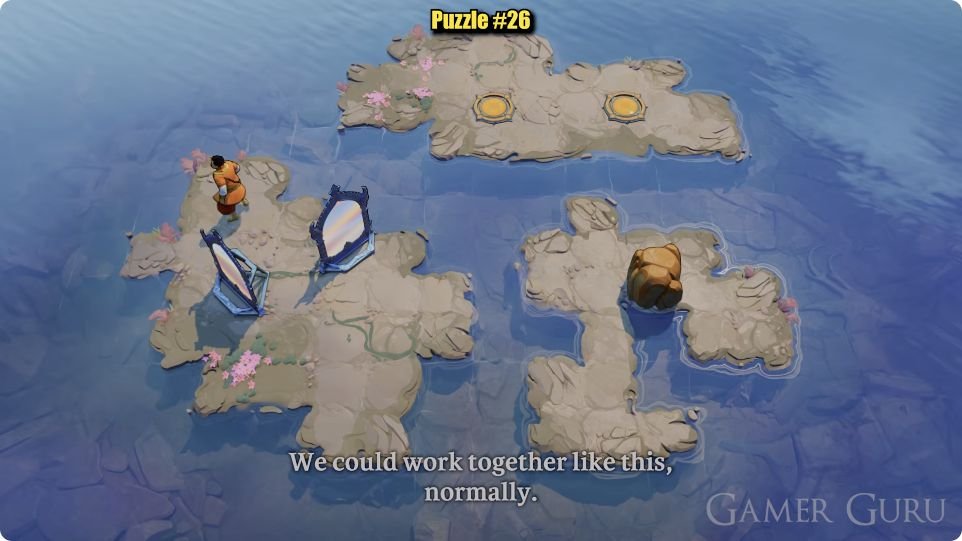 Mirror Isles · Room 26
Two figures, a brown rock and two northern circles
Match the two western mirrors, the eastern brown rock and the two circles on the long northern island. Both starting figures are solid, not pale reflections.
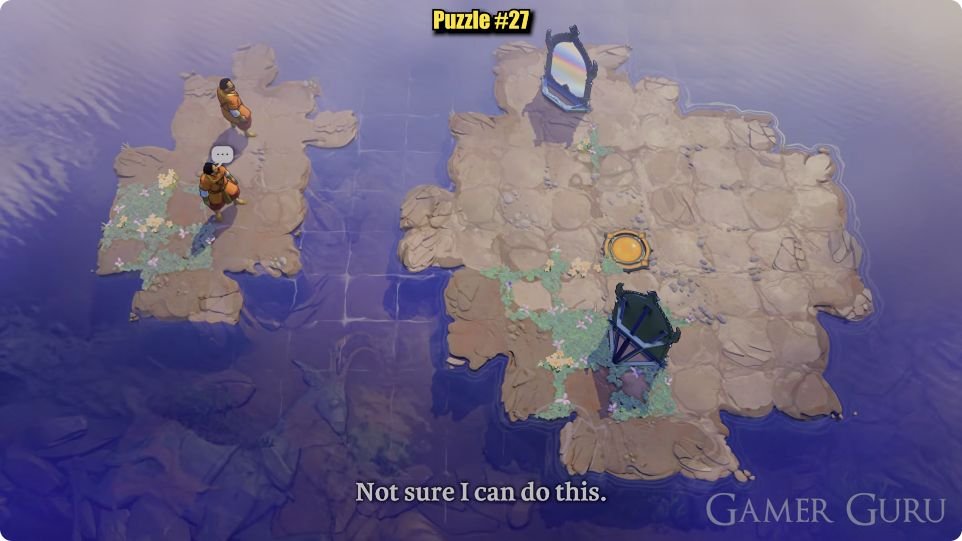 Mirror Isles · Room 27
Two western figures and one eastern circle
Compare the two figures on the western island with the two eastern mirrors and the single circle. Choose a hint before opening how the final positions fit together.
Before following a reflection
Compare the mirrors, starting figures or objects, and exit circles. Each room keeps three hints and its full route closed until you open them. A pale reflection marks another position. Check it against the room’s pictured landing before using the mirror interaction.
Based on Gamer Guru’s October 2026 launch-period recording. The exact patch is unknown; these are not personal tests of r67255 or a current-build guarantee. Use your game’s displayed controls.
Need a stone, lily pad or two-sailor route instead? Open the South-world directory.
Source: Gamer Guru’s original Mirror Isles recording and numbered map. Images and completion states were checked against that recording; hint wording and route explanations are original.