
Skipping Stones · Level 1 · Board 6
The long bay and the third stone
Use a stone from board 5 to complete the central crossing, then open the route west.
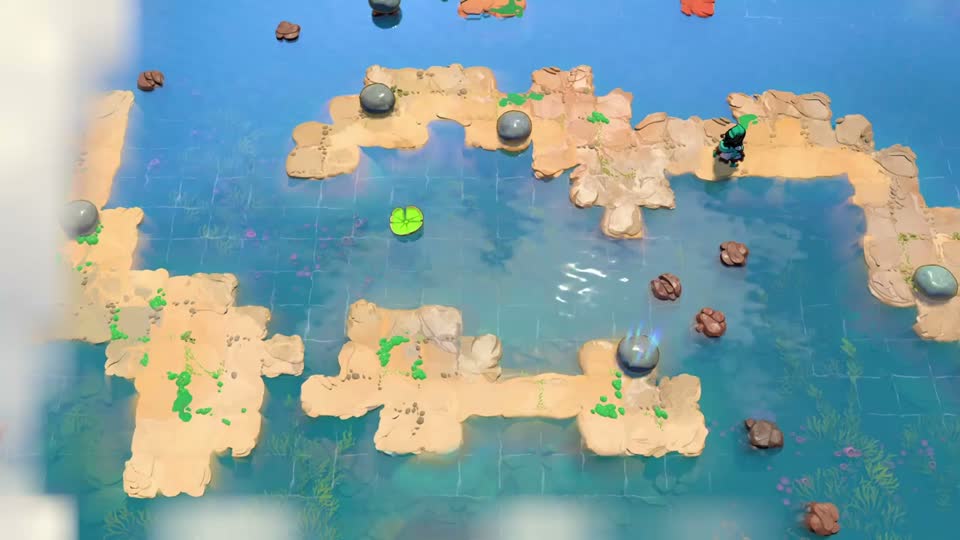
Is this your board?
A long pale upper bank curves around a bay. One lily pad sits near the middle; the route continues along a lower bank towards the left.
If your layout differs, compare the other boards before following this route.
Choose how much help you want
Stop after any hint. The complete route and later-state picture remain hidden below.
Hint 1What to notice
The nearby stones cannot do every job alone. A third stone must come from the board on your right.
Hint 2What to set up
You are steering the same pad through several positions, not making a separate bridge for every gap.
Hint 3The decisive move
After crossing, move the lower stone back across the water so two stones can meet at the western gap.
Open the full routeSolution spoilers and the target state
Set the first two throws
Move the left stone right until it is below the pad, then push down. Move the middle stone right, up, left five, then down to shift the pad right.
Bring in the extra stone
Retrieve the stone sent west from board 5 if it is not here yet. Move it up twice, left, up twice, left seven, then down into the pad. Cross and push the stone down to reach the lower checkpoint.
Open the western exit
Send the left stone up across the water, then left and down. Push it left into the one-tile water gap. Send the remaining stone all the way left into it to make the path to board 7.
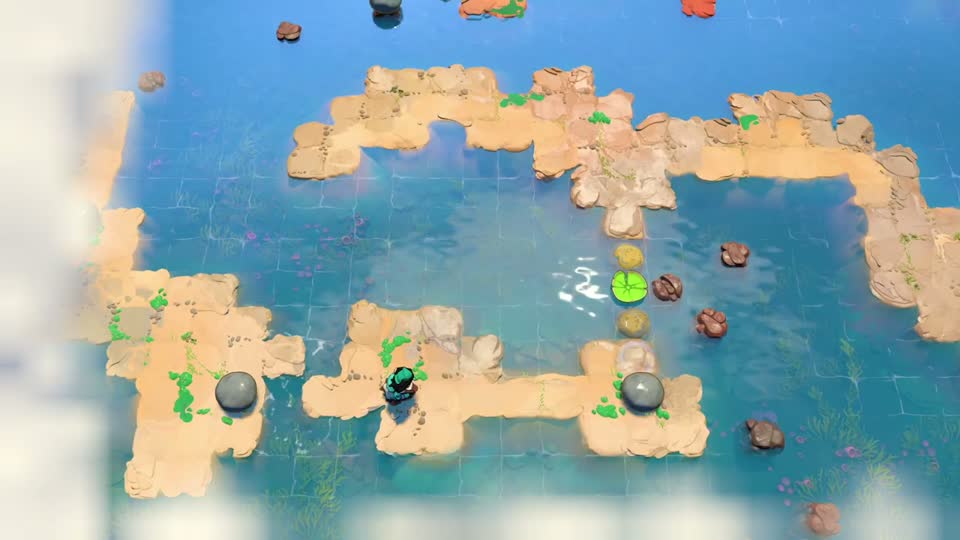
Check your result
You can walk from the lower central bank onto the left-hand exit land.
If your attempt went wrong
If the pad cannot be placed for the crossing, verify the imported stone from board 5. A reset of this board alone may not reproduce a route that depends on that transfer.
Watch the original move-by-move demonstration ↗
Opens YouTube in a new tab. No video or third-party player loads on this page.
Use directions relative to the board image. Where timing matters, use your game's current slow-time binding. Launch-layout route; the October 9 update changes some South-world checkpoints.
Further reading: Game Rant's Level 1 walkthrough. Hint wording and route explanations by Sinking Star Hub. See how to report a mismatch.