
Skipping Stones · Level 1 · Board 5
Around the hooked island
Bridge off the entrance, move the single lily pad left, and take a stone west into board 6.
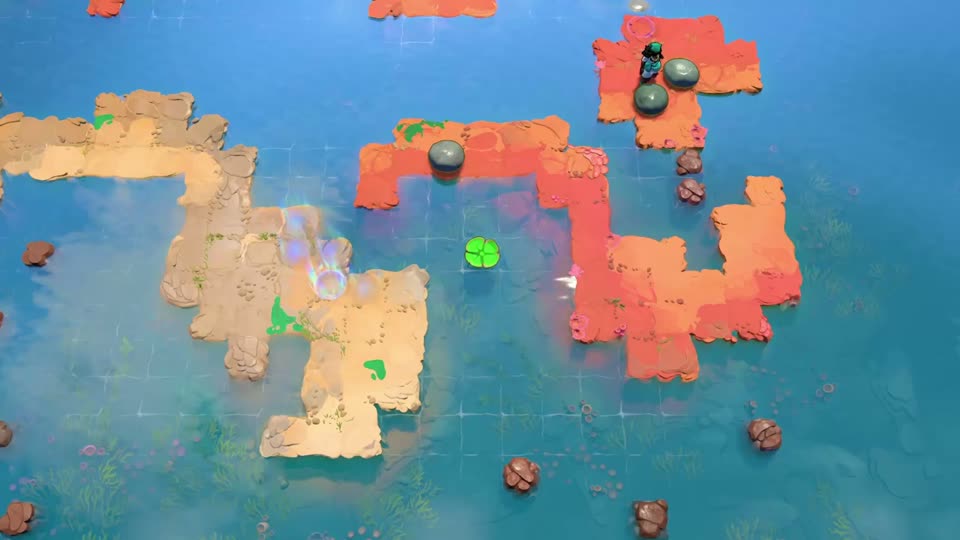
Is this your board?
A red-orange hooked island wraps around one lily pad. You enter from a small platform above it; a pale island and checkpoint lie to the left.
If your layout differs, compare the other boards before following this route.
Choose how much help you want
Stop after any hint. The complete route and later-state picture remain hidden below.
Hint 1What to notice
The two stones at the entrance do different jobs: one creates the stop, the other completes access to the hooked island.
Hint 2What to set up
Reach the orange island before trying to use its pad. The pad needs to move towards the pale checkpoint bank.
Hint 3The decisive move
When the crossing is ready, the remaining movable stone still has to be placed so you can reach its useful pushing side.
Open the full routeSolution spoilers and the target state
Leave the entrance platform
Push the right-hand stone right, then down across the water. Put the imported stone in the same column and throw it down into the first to make a bridge.
Move the lily pad
Use the first stone: down twice, left four, up, then left. This shifts the pad towards the pale island.
Cross and take the stone onward
Move the other stone right three, down, then left across the water. Push it down to finish the crossing to the checkpoint. Reposition it one row below the lily pad, then push left four tiles into board 6.
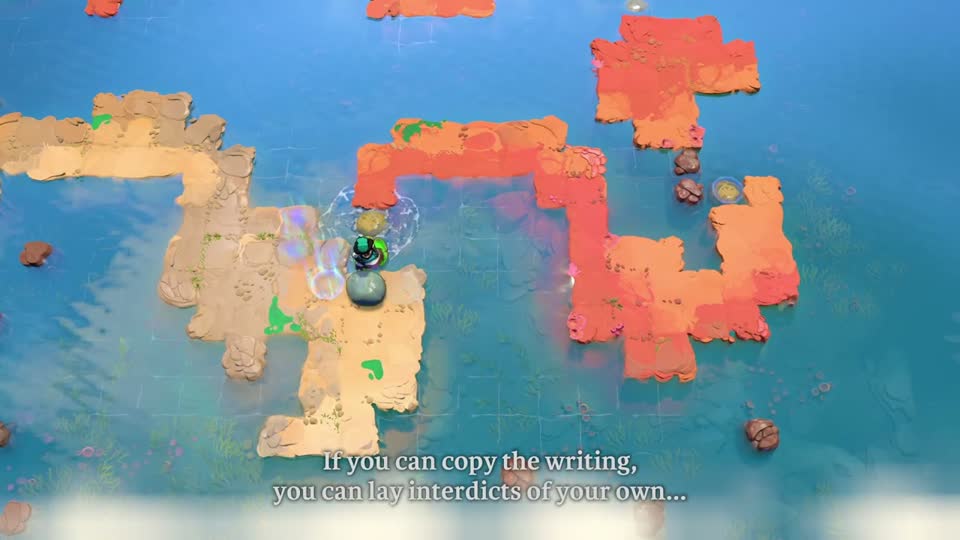
Check your result
You have the left checkpoint and a stone positioned for the westward transfer.
If your attempt went wrong
If the west side is reachable but board 6 lacks its extra stone, the transfer is still unfinished. Preserve the movable stone instead of sending it into unrelated water.
Watch the original move-by-move demonstration ↗
Opens YouTube in a new tab. No video or third-party player loads on this page.
Use directions relative to the board image. Where timing matters, use your game's current slow-time binding. Launch-layout route; the October 9 update changes some South-world checkpoints.
Further reading: Game Rant's Level 1 walkthrough. Hint wording and route explanations by Sinking Star Hub. See how to report a mismatch.