
South world · Outdoor routes · Side teleporter
Reach the side teleporter across three pads
Move the right-hand pads into a crossable arrangement without losing the outer bridge pad.
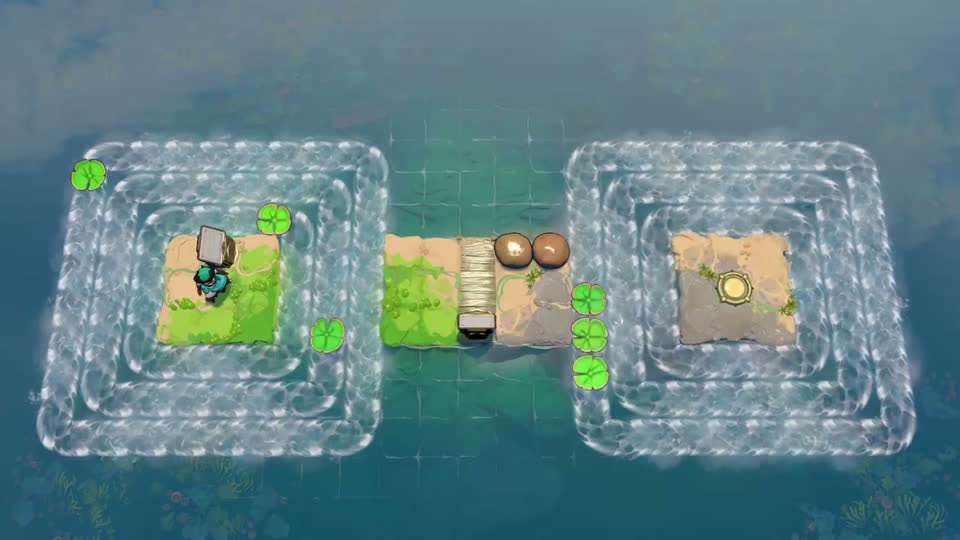
Is this your board?
Three small islands sit inside nested square currents. The middle island holds two round stones; a yellow teleporter is on the island to the right.
If your layout differs, compare the other boards before following this route.
Choose how much help you want
Stop after any hint. The complete route and later-state picture remain hidden below.
Hint 1What to notice
First get to the middle island. The two stones there control the right-hand crossing.
Hint 2What to set up
Wait for all three right-hand pads to line up vertically in the leftmost current before the first throw.
Hint 3The decisive move
Throw the right stone up to move the lower two pads into the middle current. Then use the other stone’s rightward throw as the middle pad passes.
Open the full routeSolution spoilers and the target state
Cross to the central island
Board the left pad, step to the second when they align, then to the third and onto the central platform. Let the currents bring the pads to you.
Prepare the vertical alignment
Stand below the right stone. Wait until the three right-side pads form a vertical line in the leftmost current. Push up: the lower two shift into the middle current while the top pad stays on the outside.
Move the middle pad inward
Stand left of the remaining stone and push right. Push right again as the middle pad passes in front of it, directing that pad into the inner current.
Cross to the teleporter
Use the three pads to cross the nested loops and step onto the right island’s yellow teleporter. This is a side route; the Level 2 entrance is a separate objective.
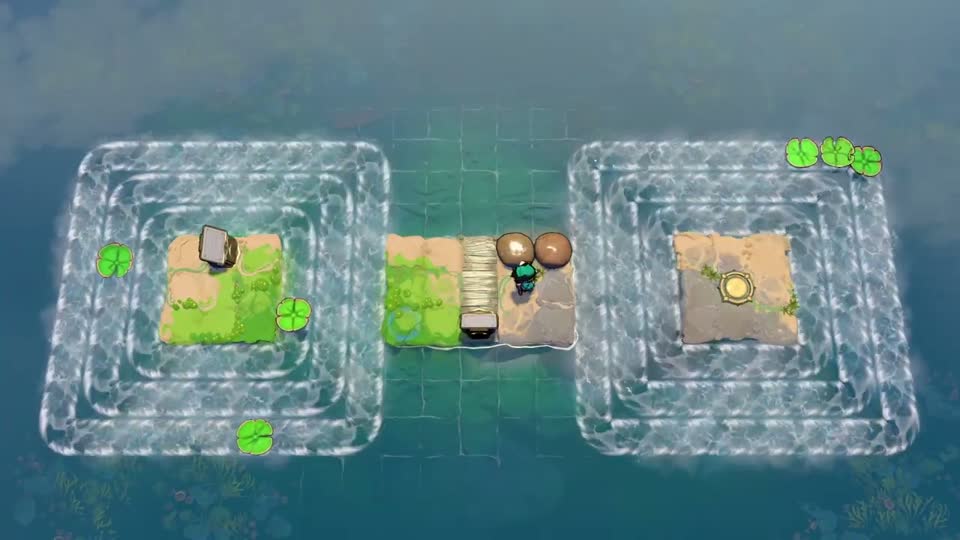
Check your result
After the first throw, one pad remains on the outer loop and two are in the middle loop. After the second steering move, the inner loop has a pad too.
If your attempt went wrong
Undo the throw whose alignment was wrong. Use the slow-time binding shown by your current game; old controller labels may differ after updates.
Watch the original move-by-move demonstration ↗
Opens YouTube in a new tab. No video or third-party player loads on this page.
Use directions relative to the board image. Where timing matters, use your game's current slow-time binding. Launch-layout route; the October 9 update changes some South-world checkpoints.
Further reading: Game Rant's South-world walkthrough. Hint wording and route explanations by Sinking Star Hub. See how to report a mismatch.