
South world · Outdoor routes · After Level 2
Open the lower dock and find the left branch
Bridge both gaps and follow the lower route to the left-hand puzzle branch.
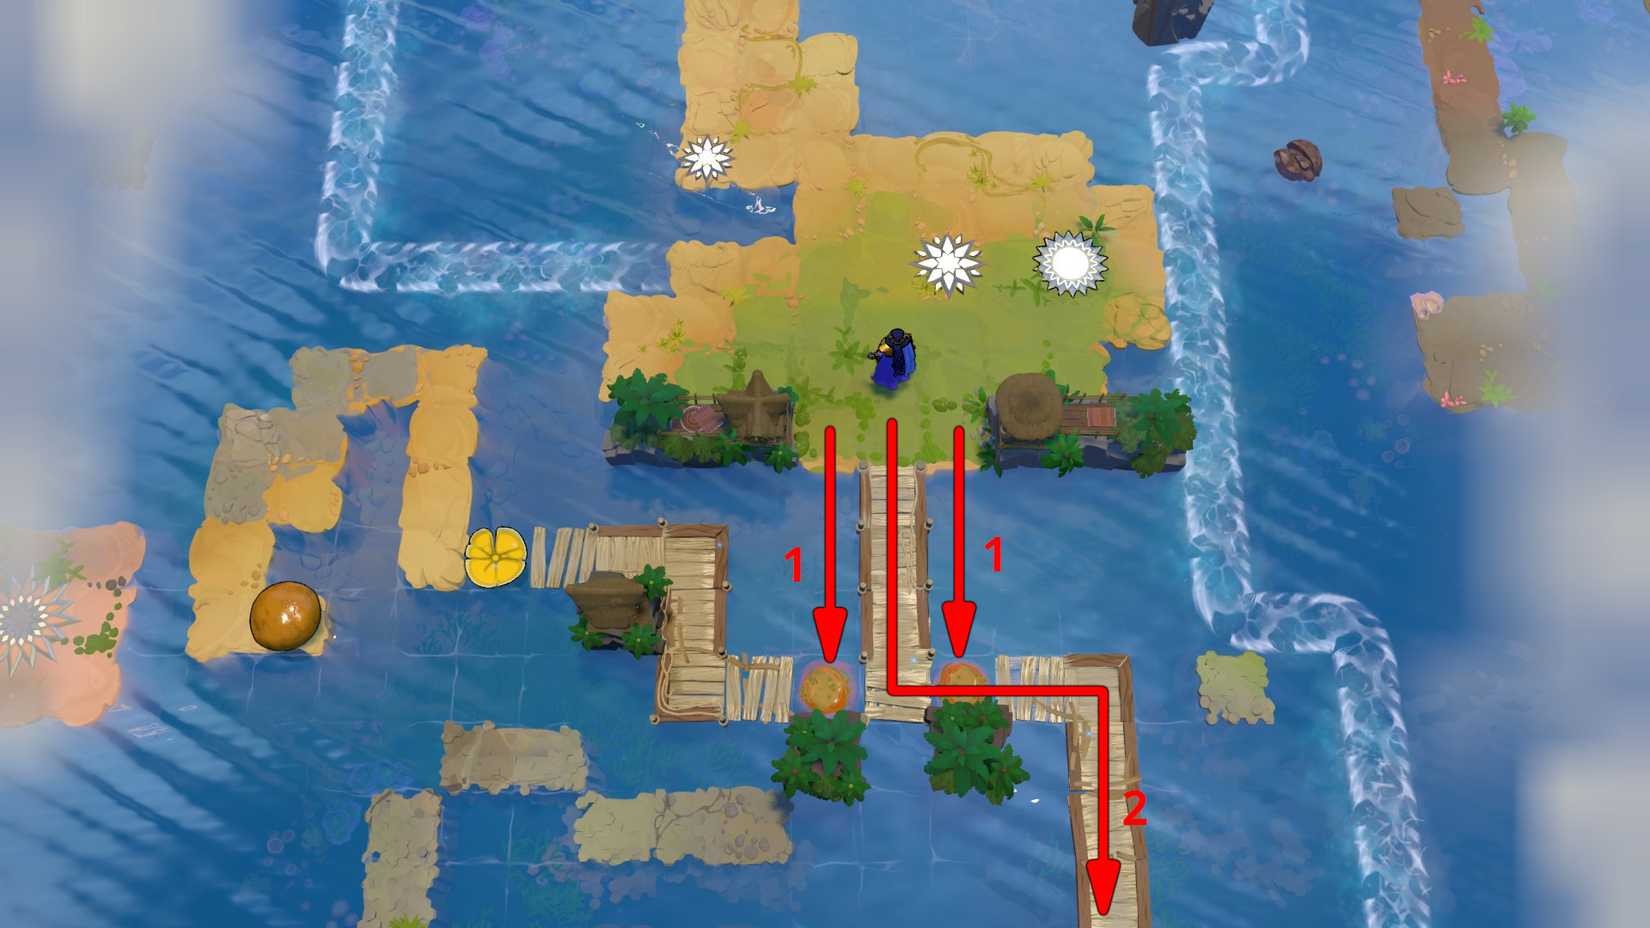
This outdoor overview is annotated and shows the route. It is not a spoiler-free puzzle image.
Is this your board?
Below the Level 2 entrance, two large stones flank a straight wooden walkway. The path below has a gap on either side.
If your layout differs, compare the other boards before following this route.
Choose how much help you want
Stop after any hint. The complete route and later-state picture remain hidden below.
Hint 1What to notice
Finishing Level 2 changes what you can reach below its entrance. Check the two stones beside the walkway.
Hint 2What to set up
Each stone fills its own gap. Do not send both to the same side.
Hint 3The decisive move
Push both stones down, cross the walkway, then follow the path right and down to the lower hub.
Open the full routeSolution spoilers and the target state
Fill the two gaps
After completing Level 2, push each newly accessible stone down into the gap beneath it. They complete the left and right sides of the wooden route.
Reach the lower hub
Walk across, turn right and follow the wooden path down. The next area has several star-marked entrances and a tall central causeway.
Select the left branch
Use the left-hand puzzle sequence indicated by the lower-hub overview. Its first board has two horizontal banks, one stone and two pads beside the upper-right jetty.
Keep both sailors in view
The six boards of this branch use the original sailor and the companion together. Our branch pages call them A and B respectively.
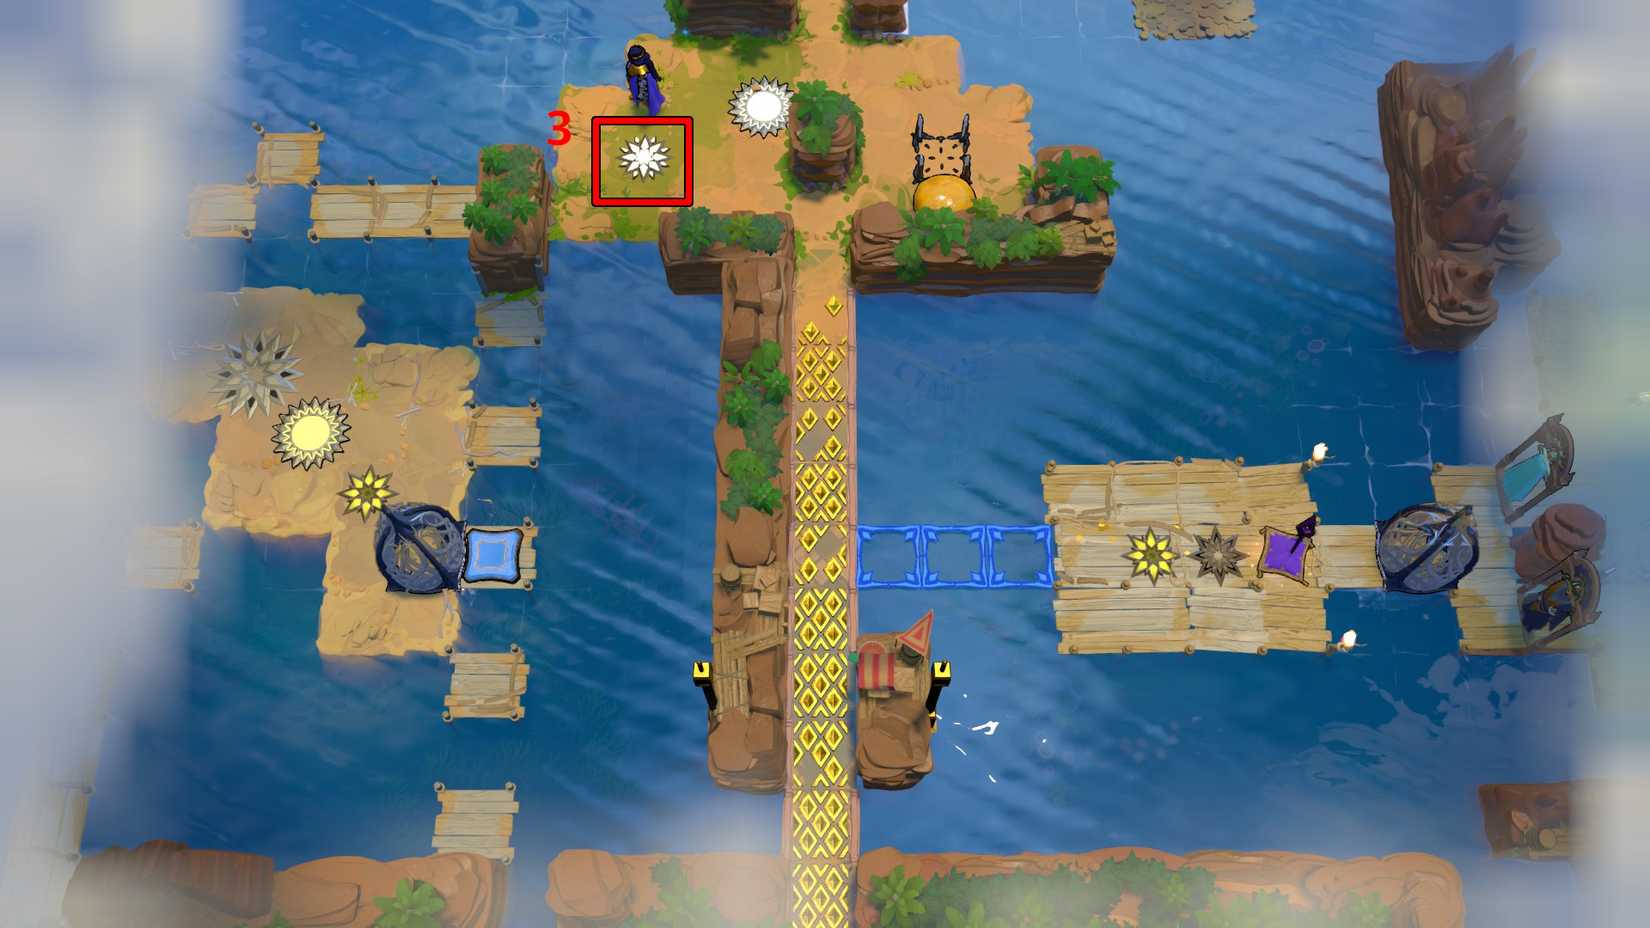
Check your result
Both gaps beside the walkway are passable, and the selected branch opens on the two-bank board rather than a different lower-hub entrance.
If your attempt went wrong
If the stones cannot be reached, return to Level 2’s final boat-return task. If the next board looks different, compare the branch-entry image before following a route.
Use directions relative to the board image. Where timing matters, use your game's current slow-time binding. Launch-layout route; the October 9 update changes some South-world checkpoints.
Further reading: Game Rant's South-world walkthrough. Hint wording and route explanations by Sinking Star Hub. See how to report a mismatch.